Detailed description of the Peak Tram Tracks and the Passing Loop see: What keeps the Peak Tram on the tracks and avoids halfway collisions ?
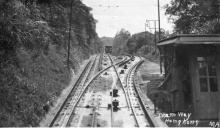
The passing loop has a combination of the two-rail layout below, four rails layout in the loop, and the three-rail layout above the loop. The changeover from two to four rails can be seen in the photo below.
This layout requires a switch with movable blades (consists of a pair of linked tapering rails, known as points (switch rails or point blades), lying between the diverging outer rails). This type needs to be operated either manually or via motor-operated remote control. It looks as if this was necessary for the Peak Tram from the start in 1888, possibly up to the 1950s. (Booth described his view looking uphill from the May Road Bridge over the Peak Tram: "a small signal box in which a man changed the points at the passing place".
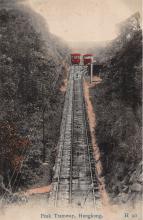
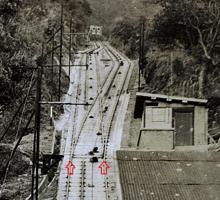
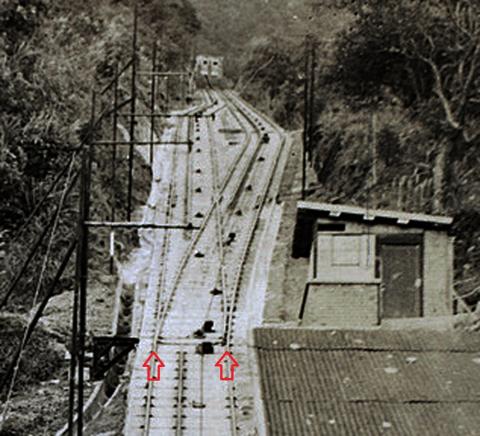
The situation uphill from the loop is somewhat less complex (see photo below, it shows the view downhill):
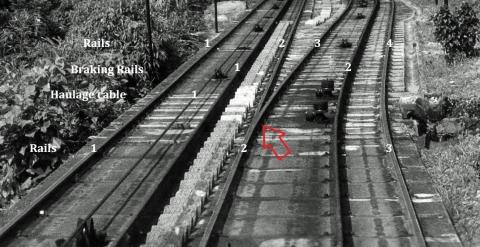
In the loop, there are four rails that become three above the loop. The rails number 2 and 3 merge where the red arrow is. Here the main advantage of the three-rail arrangement can be seen.: no movable parts are necessary. At the point of the red arrow, the number 2 rail continues straight ahead. Also at this point, a new rail turning right (which will become number 3) is welded to the one continuing straight ahead (or possibly the y-shaped rail is forged in one piece).
Likely in 1989, the original switches were replaced by Abt's switches which do not have moving parts.
The Peak Tram Upgrade Project between 2019 and 2022 introduced longer cars. For a safe passing of the cars, the loop had to be modified.
Photos that show this Place