Introduction
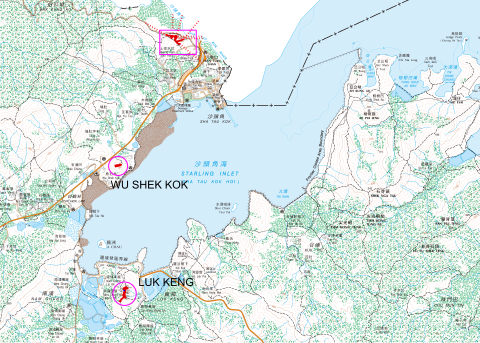
Starling Inlet is in the far north east of the territory, surrounded by rugged hills and rural settlements. The main town of Sha Tau Kok straddles the boundary with the Mainland conurbation of Shatoujiao. From a military perspective, the inlet has the only beach in the territory large enough to land a division of soldiers, some 10,000 to 20,000 personnel [1].
In present times, it is a busy place with a road crossing to the Mainland. However, in the past, this was one of the key trading routes into China and which had an ignominious reputation of being bandit country. In 1945, the Japanese garrison were planing for their defence of Hong Kong from the Allied forces. Given the good landing beaches, Starling Inlet was the ideal place to commence an invasion, the Japanese planed and built defences to provide resistance before, and like the British before, they pull back to Hong Kong Island.
Around Starling Inlet, a number of battery positions were established to fend off attackers. On the hill above Luk Keng, trenches and around ten pillboxes were built by the Japanese have been identified in a recent survey[2]. The same report identified trenches and pillboxes on a hill at Wu Shek Kok (to the south of The International College Hong Kong). The position provided protection to both the Sha Tau Kok Road and Sha Tau Kok Hoi.
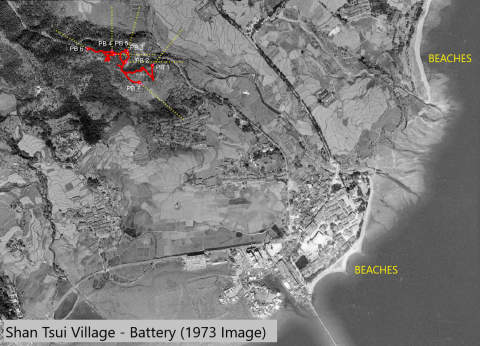
With the opening up of the closed border area in March 2012, trenches, pillboxes and temporary artillery positions were identified to the north of Shan Tsui village. The hill is identified on Google Maps as Japanese Battery Hill [3]. It would seem the site has not been recorded, so its about time for a walk around.
Site Visit
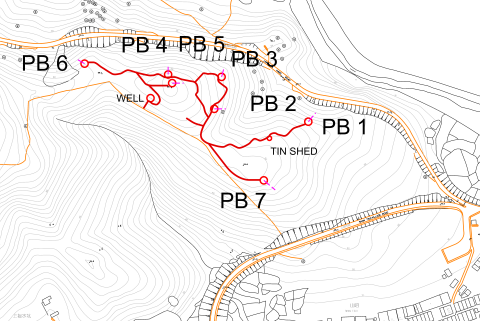
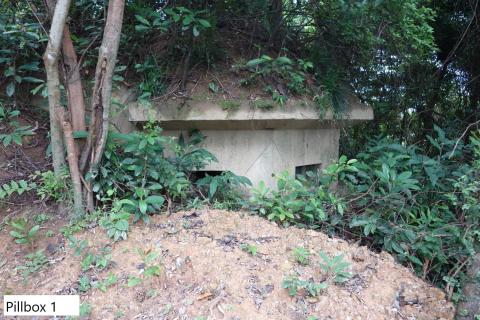
Parking by the boundary fence, then a short walk up the road to a path heading north up the hill and into the village graveyard. Behind some of the graves at an elevation of 40m, the first pillbox is encountered, a large concrete structure, half buried in the under growth but in good condition.
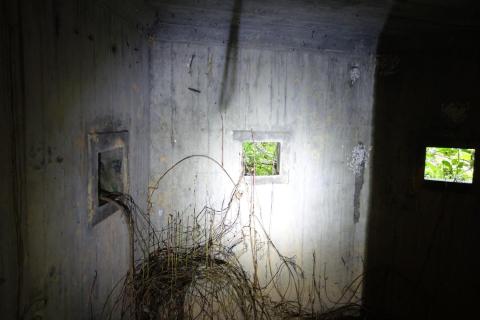
The shooting holes or ‘embrasures’ were directed to the northeast, over what was a fertile valley, but which is now studded with Mainland tower blocks. The box was constructed from good quality concrete, with a small alcove to the right as you enter, before reaching the main firing room.
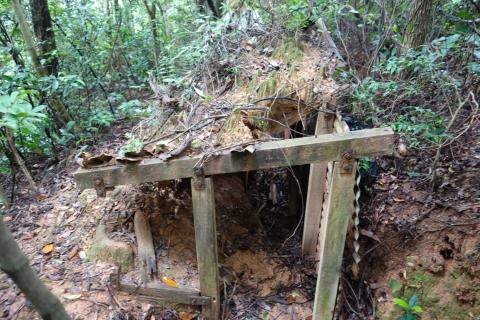
Proceeding along one of the many reasonably well-maintained trenches around the hillside, we encountered a wooden structure that had covered the trench. The timber and remains of a corrugated steel cladding structure suggest a more recent addition, possibly a lookout assembled by the British forces in the 1950’s. This structure was not up to the same standard as the Japanese military installations!
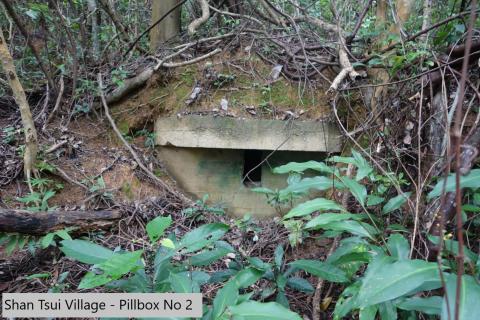
Pillbox 2, is a much smaller structure with only a single embrasure. The entrance to the structure was blocked with mud and scrub but the box was no more than a shooting position. The embrasure points due east, possibly providing protection to Pillbox 1.
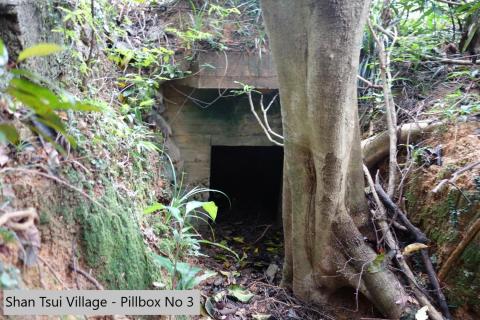
Pillbox 3, was again a small unit, half filled with mud and the entrance blocked by a tree. Adjacent to the site of the pillbox, a flat concrete slab and debris indicated the presence of a temporary structure, no doubt part of the British military improvement works! The pillbox provided a shooting position looking almost due north across the valley.
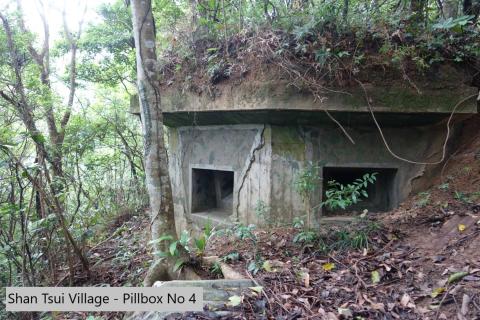
The trench contours around the north side of the hill and is joined by a trench coming over from the south side of the hill. Above this is a prominent Pillbox 5, but first we visited Pillbox 4. This is a larger unit with three embrasures and a pipe in the roof, for ventilation one assumes. The position looks due north and across the valley. The structure has traces of being painted with army camouflage colours, again one assumes a British adaption for monitoring the border.
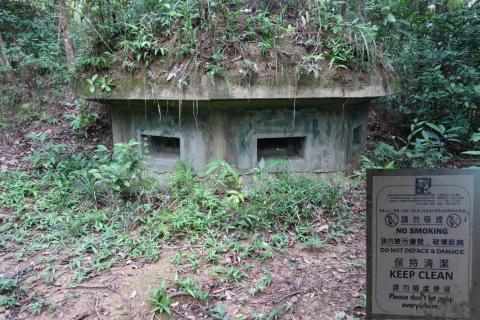
Pillbox 5, is on the top of the hill, providing a clear view to the east and out to sea. The structure is clearly a local spot for visitors as it has a very informative sign confirming these were Japanese army defences and had been constructed using local labour.
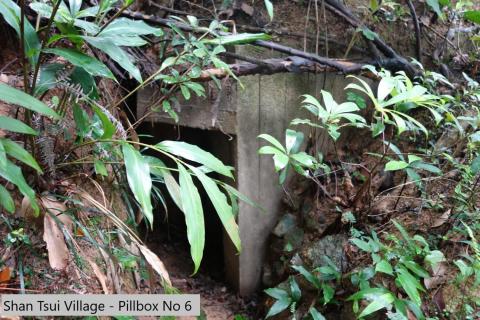
Returning back to the contouring trench, we reached the final Pillbox 6, a small structure looking up the valley to the north-west. Adjacent to the box, the Government had undertaken slope protection works, covering the front of the structure with shotcrete.
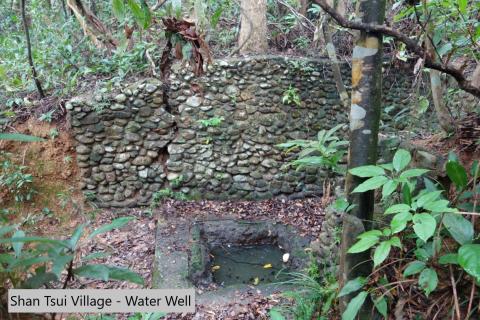
Returning back to the top of the hill, on the south, a trench swings around down to the west, to a water well protected by a stone retaining wall. The trench continues for a few metres to join the main path heading up the mountain where there are said to be more Japanese fortifications.
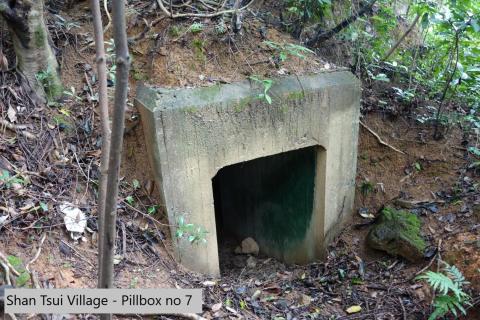
Descending the wide path, more trenches can be seen contouring around the hill, along with Pillbox 7, providing protection from the south east.
There may be more structures on the hillside, but it is clear that the battery was established to provide protection against advances from China and the sea. Along with the tunnels and kamikaze boats on Lamma Island, this battery would have provided a significant challenge for an advance force, but in the end, it was never tested.
[1] Eastern Fortress, A Military History of Hong Kong, 1840-1970, Kwong Chi Man and Tsoi Yiu Lun, 2014
[2] Survey Findings on Japanese World War II Military Installations in Hong Kong, Surveying & Built Environment, Lawrence W.C. Lai, Ken S.T. Ching and Y.K. Tan, 2011 ISSN 1816-9554
Comments
Thanks for the thorough
Thanks for the thorough report, this is a good addition to the page we have for the Luk Keng pillboxes across the inlet.
At Luk Keng there's a very similar structure to the one marked as a well above:
I think they're more likely to be water tanks. Looking down a well we'd expect to find a stretch of dry pipe until we reach the water table and water. But in both of these they're filled up with water.
I've also added a couple more tags to this page so it shows up on the map of Japanese pillboxes, and the busier map of all pillboxes.
Regards, David